
Motorizing the Wonder Junior Grain Mill
-From a Wonder Junior Customer, Glen Reynaud-
Why:
Soon after I bought my Wondermill I realized that as much as I enjoyed baking with fresh ground wheat, I would probably use it more often if it was motorized. (So would my wife)
I also wanted the option to quickly return the mill to manual status.
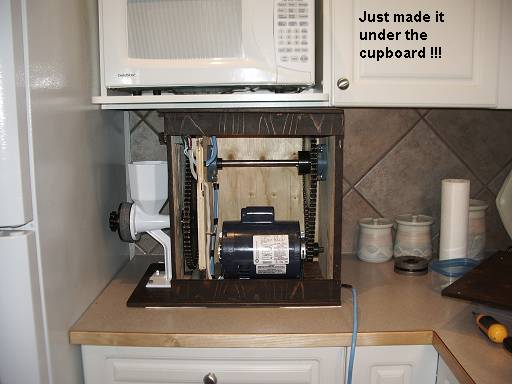
The problem with most motorized configurations was the space they took up. I live in an apartment and I needed the whole thing to fit on the counter under the microwave. The unit could not exceed 19 inches high and 24 inches deep. My counters are 24 inches deep.
The design had to be simple, few parts, and robust enough to last a lifetime.
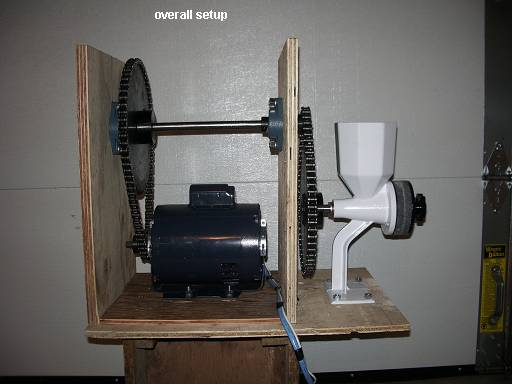
This configuration turns the stones at 56 RPM on low speed and 83 RPM on high speed.
First consideration: Belt or Chain
Though chains and sprockets are heavier, they allowed me to bypass the need for tensioning mechanisms and adjustments. Just put the sprockets where they need to be and cut the chain to length, leaving a tiny bit of slack.
When you are running a very large sprocket close to a very small sprocket, the small sprocket has only about 40% (ish) of the belt touching. This amount of contact will not work for a belt without a lot of tension. It works great for a chain with no tension.

When using pulleys, the belt has to be tight. This adds more force to the bearings, wearing them out faster. Chains don't need to be tight, and would apply less pressure to the bearings.
A side benefit of using the heavy sprockets is that they act as a flywheel. If you hit a tough spot while grinding hard grains, the momentum of the sprockets powers through and the electric motor receives less stress.
Second Consideration: Power
Although I could have gotten away with a smaller motor, I chose a 1/2 HP furnace fan motor. It was brand new and on sale for $50. I had to take it. Way over powered but the way I see it, it will last longer if it's not working hard.
At 1150 RPM (slow speed) it puts out 1/6th HP. At the mill it is generating enough torque to literally crush small stones effortlessly. (I had a few stones in my beans, and they came out as powder. The motor didn't slow down. Made a lot of noise though). At 1750 RPM it puts out 1/2 HP. Very fast and powerful.
Motor specs:
- 115 volt
- Two speed
- 1/2 HP - 1/6 HP
- RPM High1725, Low 1140
- Thermally protected
- Reversible
Parts List:
- 2 - 10", 60 tooth, #40 sprockets
- 2 - 3", 13 tooth, #40 sprockets
- 3 - 5/8" bore #40 sprocket hubs
- 1 - 1/2" bore #40 sprocket hub (this fits onto the motor shaft).
- 1 - 3' length of keyed 5/8" shaft and key stock
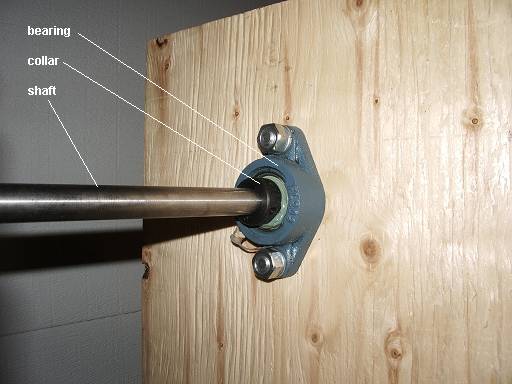
- 2 - 5/8" pillow block bearings and shaft collars (usually come as a set)
- 1 - ten foot #40 pre-lubricated roller chain
- 2 - sets of master links for the #40 roller chain
- 1 - 10' extension cord (high amp)
- 1 - High amp switch (2 or 3 position depending if you want one or two speed)
- 1 - sheet of 1/2 inch rough plywood
- 1/2 - sheet of rough 3/4 inch plywood
- 12 - 1/4 X 1 1/2 machine bolts and nuts
- 12 - 1/4 X 1" washers
- 1 - box of Twist-on wire connectors
- 1 - furnace fan motor w/mounting base
- 1 - Wondermill Junior
- 1 - box of 1" wood screws
- 1 - box finishing nails
- 1 – can of stain
Getting started:
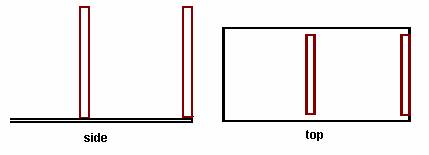
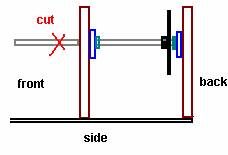
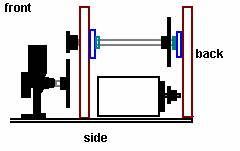
NOTE: The following drawings ARE NOT TO SCALE. Their purpose is to give you an idea of the positioning of the various components.
- Place the hubs into the sprockets and weld them in place (one of the small sprockets gets the 1/2" bore hub)
- Cut a 24" X 14" piece of 1/2 inch plywood. This will be your base
- Cut two 18" X 12" pieces of 3/4 “ plywood. This is the internal frame that the bearings and shaft attach to.
- Measure the distance from the bottom of the mill to the center of the mill shaft (it's about 6 1/2 inches BUT MEASURE TO BE SURE.)
- Mark one 3/4" board centered and 6 1/2 inches from the bottom.
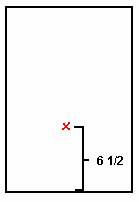
- Place a large sprocket centered over the mark. Place a small sprocket centered over the large one leaving 1/2 inch between the two, and mark the center of the small sprocket.
- Remove the sprockets and place the two 3/4 inch boards on top of each other, and flush. Use a clamp to hold them together.
- Drill a 5/8 hole through both boards where the small sprocket was marked. This will be where your shaft passes through.
- Set a pillow block bearing over the center of the hole and drill holes through both boards for the bolts to go through.
- Fasten the two 3/4 inch boards to the base plate. One flush to the end and the other one 13" away (center to center). Square them with the base and brace them using scrap wood if need be. Screw them to the base from the bottom.
- Fasten the pillow block bearings to the vertical walls. They must be facing each other. Use machine bolts for this.
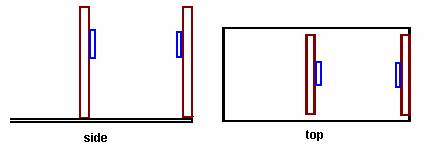
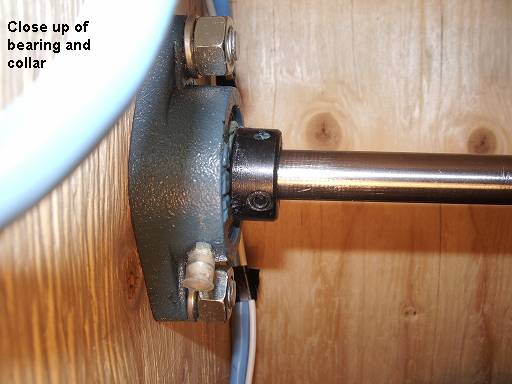
- Insert the 5/8" shaft through the rear bearing. Once through the rear bearing, slide on a bearing collar, then a large sprocket (hub to the front), then another bearing collar. In this order. Continue to slide the shaft through the second bearing. Allow 2 inches of shaft to stick out past the front wall. Mark and cut off the excess. Set the bearing collars onto the bearing races and lock them into place with the setscrews.
- Slide the small sprocket with the 1/2" hub on to the motor shaft (hub facing out) and tighten the setscrews. Make sure one of the setscrews is placed on the flat side of the shaft. Place the sprocket as close as you can to the motor without the chain touching the motor housing. Wrap the chain around it to test for clearance.
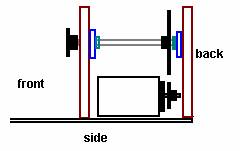
- Place the motor on the wood base; making sure it is square to the base. Mark the holes for the motor mount and drill holes in the base to fasten the motor. Use machine bolts for this. Bolt head down. Before installing the motor, cut the female end of the extension cord and hook up the free wires to the motor. Use your motors wiring diagram to do this.
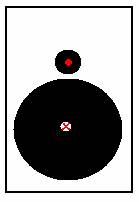
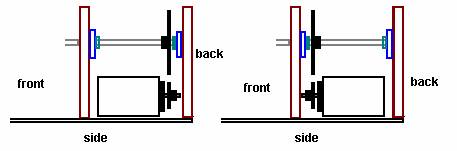
- The mill must turn clockwise. If you must, reverse the motor to accommodate this OR you can point the motor in the opposite direction. Like so….
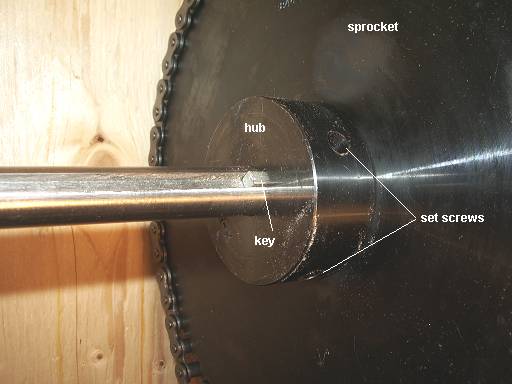
- Tap a key into the top shaft and hub, fine tune the alignment with the motor sprocket and tighten the setscrews.
- Slide the other small sprocket onto the front of the shaft (hub to the back). Leave enough space between the hub and the wall to turn freely. 1/16" is enough clearance. Tap in a key. Tighten the setscrews.
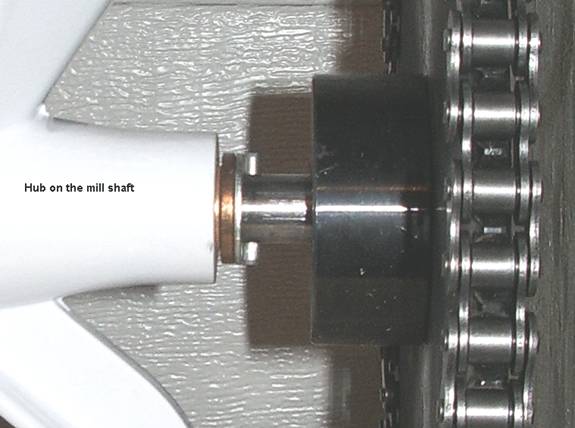
- Slide the other large sprocket onto the mill shaft (hub facing the mill). The end of the shaft should be flush with the sprocket.
- Insert a pencil lead into each setscrew hole in the hub and mark the shaft.
- Remove the sprocket and put the mill shaft in a vice. Use a punch to make a dent in the shaft where the marks are. Use a 1/4 “ steel bit to drill a small indentation, using the punch dents as a guide for your bit.
- Slide the sprocket back on the shaft. Line the setscrew hole up with the indentations. Insert and tighten the setscrews.
- Put the mill, with its new sprocket, in place. Line the sprockets up as close as possible. Be sure the two sprockets are lined up vertically and square to each other.
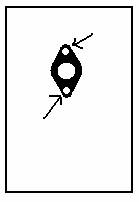
- Mark the holes at the base of the mill and drill 1/4 inch holes in the wood base. Fasten the mill using machine bolts, head facing down, and the nut on top. (In this picture the chains are already on. They won't actually be on at this point.)
- Put on the chains.
- Measure the chain by wrapping it around the sprockets and marking the link you need to cut. Connect the master links. Leave a little slack. The chain should not be perfectly tight.
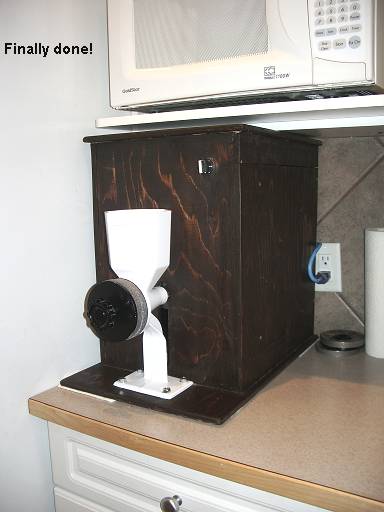
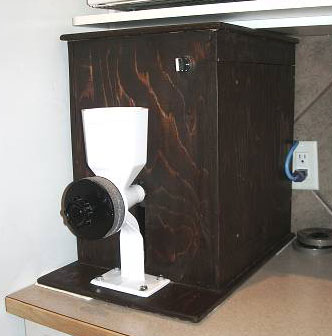
Enclosing the box:
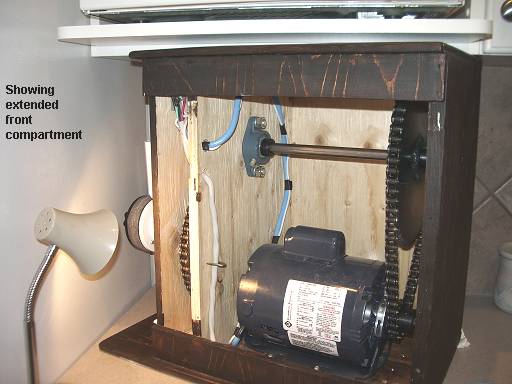
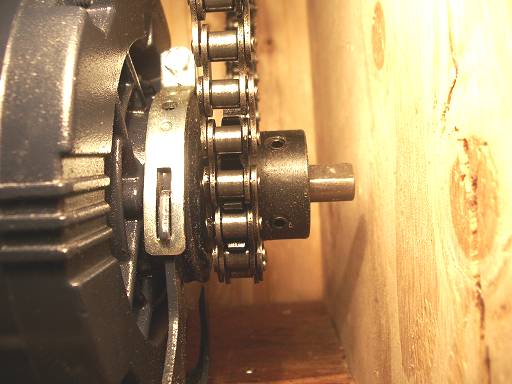
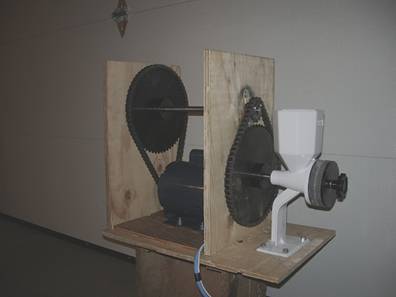
How you enclose the box at this point is a matter of taste. I recommend enclosing the front sprocket by extending the enclosure to cover it. I also recommend making one side of the enclosure removable for access. See photos.
Once you have enclosed the box, you will need to check the alignment of the two sprockets on the top shaft. Loosen the setscrews, adjust, and retighten. Finishing the box can sometimes throw things off. You will hear the chains growl if things aren't lined up right. If you need to lift the motor a little to give you some slack, just add washers under the motor base.
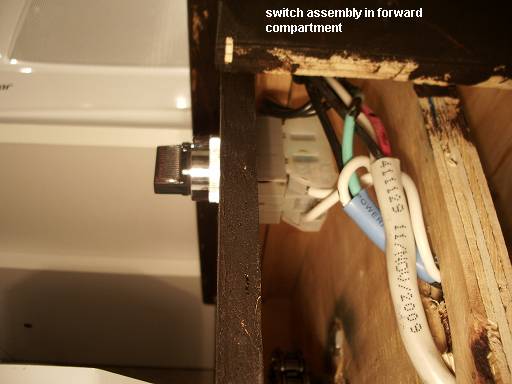
Now that the enclosure is done, you can decide where you want the switch. Use a high amp switch. Whichever type of switch you use (on/off, three position for low, high and off) closely follow the wiring diagram.
Solder all connections, and use twist connectors to splice wires.
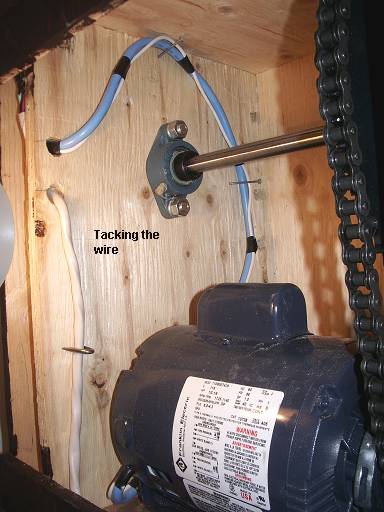
Be sure to tack all wiring away from moving parts.
To return the mill to manual status, loosen the set screws on the mill shaft sprocket, remove the four nuts on the base of the mill, remove the mill and reattach the hand crank and base clamp.
WARNING: DO NOT WORK INSIDE THE ENCLOSURE WHILE THE UNIT IS PLUGGED IN. THERE IS SUFFICIENT TORQUE AND SPEED TO QUICKLY REMOVE YOUR FINGERS!!!!
Photo gallery